Weatherproofing tips for roof bags, soft-sided carriers, and open baskets
If you’re relying on a roof bag or hitch-mounted cargo carrier to expand your vehicle’s storage space, you’re probably hauling gear that you’d rather not get soaked. Unfortunately, even “weatherproof” or “water-resistant” labels can be misleading. Once you’re driving at speed through wind-driven rain or slush, any weak spot in your carrier setup becomes a vulnerability.
Whether you’re packing up for a weekend road trip or hauling gear through winter storms, keeping your items dry requires a combination of good gear choices, smart packing strategy, and a few inexpensive add-ons. This guide walks you through what works, what doesn’t, and how to prep for unpredictable weather.
Start with the Right Type of Carrier
Your battle against water begins with the carrier itself. Not all cargo solutions are created equal when it comes to weather protection.
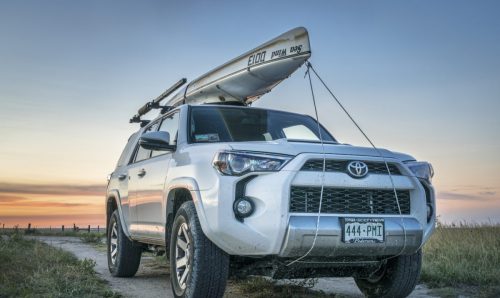
Hard-shell roof boxes offer the best built-in defense. They’re molded from plastic or composite materials, close with a sealed latch system, and shed rain and snow with ease. If dryness is your number one concern, this is the gold standard.
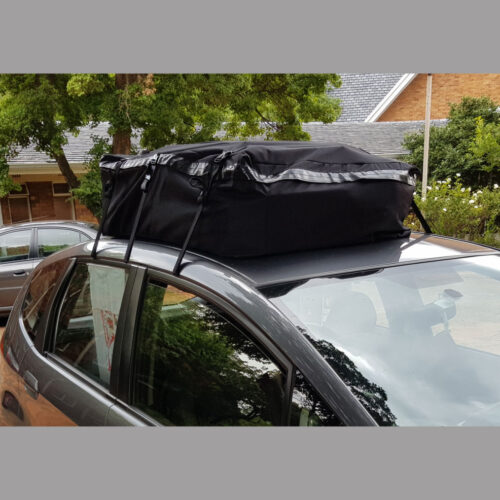
Soft-sided cargo bags (both roof- and hitch-mounted) are much more prone to leakage, even when advertised as waterproof. Most are water-resistant at best, and they often rely on zippers or velcro flaps that don’t hold up well under high-speed rain exposure.
Open-style cargo carriers (like baskets or trays) offer zero weather protection on their own. If you’re using one, everything inside will need its own waterproofing treatment.
Weatherproofing a Roof or Hitch Cargo Bag
Soft bags are popular because they’re affordable, lightweight, and easy to store. But they require extra attention to stay dry. Start with these key steps:
- Use a true waterproof liner or dry bag: If your gear must stay dry (sleeping bags, clothing, electronics), place them inside roll-top dry bags or heavy-duty contractor garbage bags before loading them into the main carrier.
- Elevate the contents inside the bag: Most water infiltration occurs at the bottom, where pooled rain can seep through seams. Use a folded towel or foam pad under your gear to lift it slightly.
- Seal zippers with care: Make sure all zippers are fully closed and flaps are overlapping. If your bag has a velcro rain flap, run it fully along the zipper line with no gaps.
- Add an outer cover or tarp: A fitted waterproof tarp can act as a second line of defense, especially useful for long trips in foul weather.
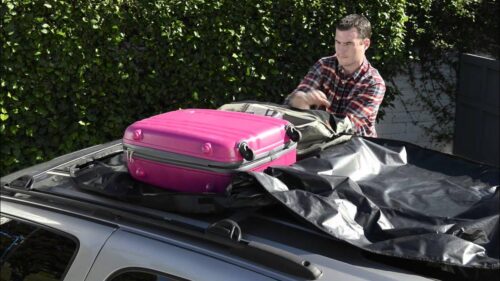
Weatherproofing Open Carriers and Baskets
If you’re using an open-style hitch tray or roof basket, your items are completely exposed to the elements. This setup demands a more layered waterproofing approach.
Start with these basic practices:
- Pack items in sealed storage bins: Plastic storage totes with snap-on lids (ideally gasketed) are your first line of defense. Avoid cracked or loose-lid containers.
- Use waterproof duffel bags: Many outdoor brands make rugged dry duffels with roll-top seals. These are ideal for gear like clothing, sleeping gear, or tools.
- Wrap in contractor-grade trash bags: They’re thick, flexible, and inexpensive. Double-bagging offers added peace of mind.
- Tarp the whole load: Once packed, wrap the entire carrier in a heavy-duty tarp and use ratchet straps or bungee cords to secure it snugly. Make sure water can run off the sides easily.
Common Failure Points (and How to Avoid Them)
No matter which type of carrier you’re using, these are the spots most likely to leak:
- Zippers: Rain at highway speeds can push water right through them. Always check for sealed or covered zippers.
- Corners and seams: Stitching areas are natural water entry points. Apply seam sealer (from a camping store) if needed.
- Bottom of the bag or box: Water collects and pools here. If your gear sits directly on the floor, it’s vulnerable. Use a platform or pack softer, sacrificial layers below valuable items.
- Damaged areas: Even tiny cracks or tears in your box, bag, or bin can become entry points under pressure. Inspect regularly and patch anything questionable.
Smart Packing Techniques That Help
Even if your outer carrier lets in a bit of water, smart packing can keep your contents protected.
Place the most sensitive items (like electronics or dry clothes) in the center of your gear load, wrapped in multiple layers of waterproof material. Around that, build a layer of less sensitive items (coated bags, plastic containers, towels). The outermost layer should consist of gear that can handle some moisture if it gets through.
If you’re packing multiple bins or duffels, consider labeling them by risk level: “Dry only,” “Water-resistant,” and “OK to get wet.” That way, you or your passengers won’t open something in the rain that shouldn’t be opened.
Wind-Driven Rain and How to Beat It
The biggest challenge isn’t rain falling from above — it’s wind-blown moisture hitting your carrier at 100 km/h. This pressure can force water through weak points that might seem sealed when stationary.
To reduce the impact:
- Angle the tarp or cover for runoff: Don’t leave horizontal surfaces for water to pool.
- Tighten everything down: Loose fabric flapping in the wind is more likely to leak.
- Cover forward-facing surfaces: That’s where most water pressure builds up. Prioritize extra coverage on the front-facing part of your box or bag.
What About Snow, Salt, and Slush?
Winter brings its own threats. Melting snow and road salt can be just as problematic as rain.
- Use a sealed tote or duffel: Saltwater can be corrosive to metal gear, tools, and zippers.
- Rinse carriers post-trip: Salt and grime left on bags and boxes will shorten their lifespan.
- Avoid placing wet gear directly in enclosed spaces: Moisture can become trapped and lead to mold or mildew.
Final Thoughts
Keeping your gear dry on the road takes more than a waterproof label. Whether you’re using a hard-shell box, a soft-sided bag, or a hitch tray, it’s all about layers, positioning, and knowing where water is likely to strike first.
If you’re heading into serious weather, don’t leave it to chance. With just a few precautions, your gear can stay safe, dry, and ready to use when you arrive.

Willem is an avid mountain biker and outdoor sports enthusiast. For years, he has been riding mountain bike stage races, including the grueling Cape Epic. As a father of three adventurous kids, he knows about packing a vehicle to haul his gear safely and responsibly from home to any exciting weekend or holiday destination.