Protect your gear, your vehicle, and your peace of mind.
Strapping bikes to the back of your vehicle sounds simple enough—until it’s not. Maybe you’ve seen someone on the highway with a tilted rack, dragging pedals, or a front wheel flapping in the breeze. Maybe you’ve been that person. And maybe now you’re thinking: “How do I actually travel with bikes the right way?”
Good question.
Whether you’re heading out for a weekend ride, driving across the country for a race, or just bringing the kids’ bikes to the campground, the goal is the same: get there safely, with zero damage to your gear, your vehicle, or anyone else’s.
Here’s how to do exactly that—starting the moment the bikes leave the garage.
Step One: Choose the Right Rack for the Job
Not every rack is created equal, and not every one is ideal for your setup.
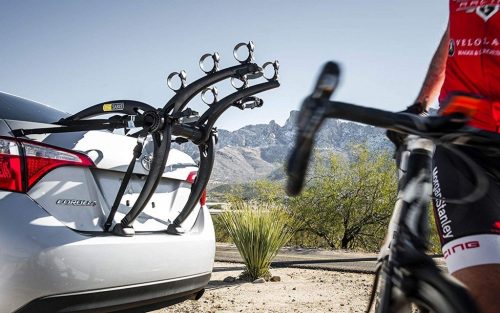
Hitch-mounted platform racks are the gold standard for most adult bikes—especially heavier or full-suspension models. They hold the bike by the wheels, avoid frame contact, and are rock solid on long drives. Bonus points if they tilt for trunk access.
Hanging-style hitch racks are lighter and often cheaper, but they put pressure on the frame and can cause rubbing or sway if the bikes aren’t secured well. They’re best for hardtails or simpler frame shapes.
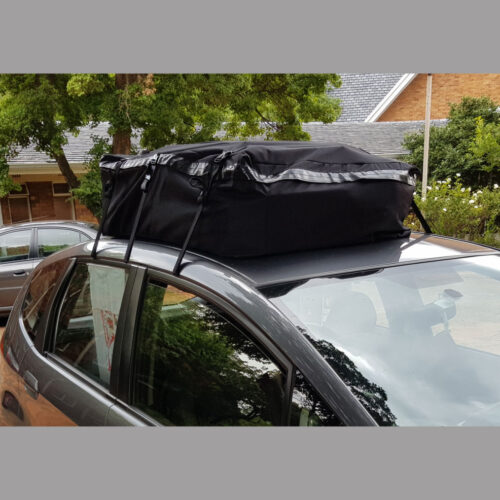
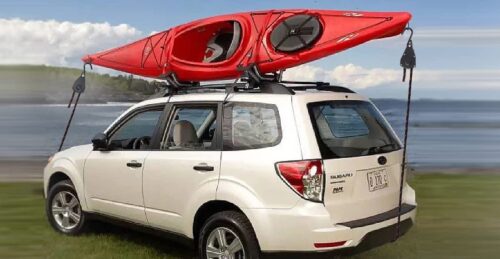
Roof racks keep the rear of your car accessible and are great for lighter bikes, but they require lifting (sometimes overhead) and they take a hit on fuel efficiency. Still a solid option if you’re carrying other gear on a hitch or trunk.
Trunk-mounted racks are the wildcard. They’re affordable and work on most vehicles, but they require careful setup and more frequent stops to check straps. If you go this route, plan for a little extra diligence.
Get the Fit Right—For Both Car and Bike
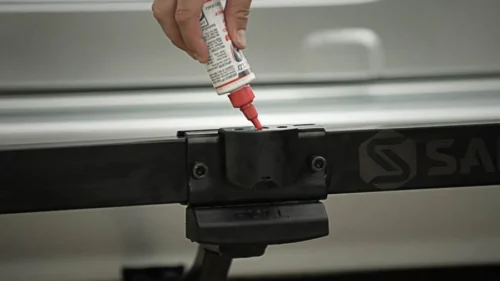
Before you even load the bikes, double-check that your rack is installed properly and torqued to spec. A loose hitch bolt, half-clipped arm, or strap sitting on the wrong part of the trunk is how gear ends up bouncing at 100 km/h.
Once the rack is secure, focus on how your bike fits on it.
- Check for crank, pedal, or bar contact with other bikes or the vehicle
- Space the bikes evenly if you’re carrying more than one
- Offset handlebars or remove the front wheel if needed to reduce overlap
- Use frame protectors or padding between bikes to prevent scratches
Nothing should be wobbling freely. Nothing should be resting on the paint. If it feels sketchy when you load it, it’ll definitely feel worse 50 miles in.
Strap It Like You Mean It
This might be the most overlooked part of the entire process. Too many riders just loop a few straps and call it good.
Instead, take your time. Wrap wheel straps snugly—no play, no slack. If the rack has a center arm or hook, clamp it firmly onto the tire or frame, but don’t overtighten to the point of damaging components.
If you’re using bungee cords or extra straps to hold accessories, make sure they’re not in contact with the bike’s drivetrain, disc brakes, or shifters. And triple check that nothing is flapping, swinging, or sitting close to the exhaust.
It’s worth adding one or two backup straps to stabilize the entire load. Some riders even use a tension strap running from the frame or rack back to a rear tow hook or hitch chain point to reduce movement on bumpy roads.
Watch Your Clearance—Especially Down Low
Depending on your vehicle and your rack style, your bikes might be hanging just inches above the ground—particularly the rear wheel of a full-suspension mountain bike or an e-bike with big tires.
That becomes a problem on steep driveways, parking lot entrances, and dips in the road. Scraping a wheel on concrete or a speed bump can do serious damage fast.
If clearance is tight:
- Avoid steep inclines at sharp angles—take them at a diagonal when possible
- Consider a rack with better ground clearance (some have tilted trays or rise bars)
- Keep heavy bikes closest to the vehicle, where the rack arms are more stable
And if you’re loading carbon fiber frames or deep rims, consider using wheel cradles with extra padding or reinforcement.
Use a Locking System—And Don’t Just Trust the Rack
Most bike racks include a basic lock system, but many are little more than a deterrent. If you’re stopping overnight at a hotel, grabbing a long lunch, or leaving your car in a lot for a few hours, you need to think security.
That means:
- Lock the bikes to the rack using a high-quality cable or chain
- Lock the rack to the vehicle (if it doesn’t already)
- Remove easy-to-grab accessories like GPS units, lights, or removable bags
And for peace of mind? Run a cable through the rear triangle and wheels whenever possible, especially if you’re carrying multiple bikes or high-end builds.
Keep the Load Legal and Visible
A common mistake? Blocking your taillights or license plate with bike tires, bags, or frame parts.
If your bikes obscure your lights or plate:
- Use a light board or auxiliary lighting kit (especially important at night)
- Install a license plate relocation bracket on the rack
- Avoid hanging bags or jackets that can flap down and hide critical visibility
Every state has laws about light and plate obstruction, and some are stricter than others. If you’re crossing state lines, play it safe and go with full visibility gear. You’re not just staying legal—you’re protecting yourself and your bikes from rear-end collisions.
On the Road: Don’t Set It and Forget It
You’ve strapped everything down, checked the clearance, secured the locks. Good to go, right?
Almost.
Even the best racks and setups shift over time, especially on longer trips or bad roads. Plan to stop every couple of hours to check:
- That straps haven’t loosened or stretched
- That bikes aren’t rubbing, wobbling, or bouncing more than before
- That locks are still engaged and nothing’s been tampered with
It only takes a minute, but it could prevent a ruined derailleur—or worse, a bike bouncing down the freeway.
Bonus tip: carry a few microfiber cloths and a small tool kit. Wipe down dirty contact points, retighten straps or bolts, and fix minor issues before they become major problems.
What About Traveling with E-Bikes?
E-bikes bring a few added challenges. They’re heavier—often over 50 lbs—and some racks aren’t rated to carry them. Always check the rack’s max weight per bike. If you’re close to the limit, err on the side of caution.
Remove the battery before transport if you can. It reduces weight, helps prevent damage, and keeps the bike more balanced. Store the battery inside the vehicle—extreme temps on a rear rack aren’t great for lithium cells.
And always use a ramp or a two-person lift if the e-bike’s too heavy to hoist onto the tray safely. Back injuries aren’t worth the shortcut.
Unloading at Your Destination
The final step is often the messiest. After hours on the road, the last thing you want to do is wrestle with a tangled rack or jammed release lever.
Make it easier by:
- Parking on level ground
- Removing locks and straps before unlocking clamps or supports
- Lowering tailgates or opening trunks slowly—check for bar contact
- Inspecting your bikes before the ride: check brake levers, wheel alignment, and drivetrains for road grime or loosened bolts
And once the bikes are off? Wipe down the rack, check it for damage, and decide whether to leave it installed or stash it somewhere safe during your trip.
Final Thoughts
Traveling with bikes doesn’t have to be a nerve-wracking experience. Get the right rack. Set it up properly. Pack with care. Stop to check in. Lock it down.
It’s that simple—and that important.
Because when you finally roll up to the trailhead or the rental cabin or the start line, the last thing you want to deal with is a broken spoke, a scratched frame, or a loose wheel you didn’t notice rattling loose somewhere outside Albuquerque.
Treat the journey with as much respect as the ride itself, and you—and your bike—will get there ready to roll. Every time.

Willem is an avid mountain biker and outdoor sports enthusiast. For years, he has been riding mountain bike stage races, including the grueling Cape Epic. As a father of three adventurous kids, he knows about packing a vehicle to haul his gear safely and responsibly from home to any exciting weekend or holiday destination.